Project Prius C: Pranayama–Huh?

Before we hit the road with yogic driving, I want to teach you how to meditate. Meditation is a part of yoga that we are going to be applying to driving. Meditation will teach you how to breathe in a way that will calm the body and clear the mind. Remember my theory: the calmest driver makes the best driver.

Yoga references many words in Sanskrit. In the title of this post I refer to the word “Pranayama” which is Sanskrit for “extension of the breath”. In Sanskrit the word “prana” means “life force”, specifically meaning “the breath”. Breathing is how our bodies survive—we draw in oxygen and breathe out carbon dioxide. In Sanskrit, “ayama” means “to draw or extend out”. At the beginning of a meditation practice the breaths are short and brisk, in the middle the breaths are medium length and by the end of the practice the breath will be long and deep. The longer and more drawn out the breath, the calmer driver.

Here’s what you need to meditate:

  • A quiet place with no distractions—yes the back seat of your minivan parked in the garage where your kids cannot find you definitely counts!
  • A soft surface to sit on where you can sit up tall with your legs crossed in front of your body—I recommend a pillow to sit atop on your floor.
  • Music (optional)—I highly recommend the Soundscapes Music Channel #743 on the Comcast Cable Network (for more about this see below). Music is a great transitional tool to use to help you sit still when you first start to meditate.

Explanation of Soundscapes

Soundscapes is a combination of sounds from nature like waves crashing, thunder, or birds chirping with a peaceful melody played by a pianist, flautist or violinist. I find the combination of sounds from nature and music creates a relaxing background for my meditation practice.

Here’s a great way to start using music and meditation together: sit and meditate to just one song. Then work your way up to two. Perhaps you will start to find that you need more than two songs to feel calmer—you want to go deeper. Try three songs and so on!

Once you have your meditation spot and (optional) music you are ready to meditate:

  1. Sit in a comfortable cross-legged position.
  2. Turn your music on.
  3. Take a deep breath in.
  4. Straighten your spine by rolling your shoulders down the back, lift your chest towards the sky, keep your chin parallel with the floor and pull your belly button in towards your spine. Do not lie on your back because you might fall asleep.
  5. Close your eyes.
  6. Place the palms of your hands on your knees with palms facing up.
  7. Start to breathe in and out.
  8. Be present. Be in the moment without thinking of what you did in the yesterday or what you have to do afterwards.
  9. Once you feel you’re finished (perhaps after a song or two), stand up and go back to your day.
  10. Notice how you feel afterwards. If you felt good today then you will feel good after meditating tomorrow too. Make meditation a part of your daily routine.

Here’s how you will look just before you’re done meditating:

Keep calm, stay strong and keep driving on!

Namaste,

Sara

Project Prius C – The Future is Coming!

The future is coming. Driving hybrid cars, like my husband’s Prius C, now offer a glimpse of what the future holds—the electric-powered vehicle. Hybrid automobiles also hang onto a part of their past—gasoline-powered vehicles.

Think of it this way: Past, Present and Future.

The past is represented by gasoline-powered vehicles. These vehicles are so yesterday! Pollution from gasoline-powered vehicles have contributed to today’s global warming crisis. Fifteen years ago, when driving a gasoline-powered vehicle was all the rage, there were one or two hybrid cars being invented and available on the market—specifically, the Toyota Prius and Honda Insight.

Today there are so many hybrid versions of some of people’s favorite gasoline powered-cars (like the Toyota Camry, Honda Accord, and Ford Fusion) and SUVs (like the Toyota Highlander, Ford Escape and Chevy Tahoe). Not too worry—the Prius and Insight are still here too!

Hybrid vehicles are powered by two engines. One is gas. The other is electric. The driving conditions determine which engine burns energy, which determines the overall carbon footprint of the vehicle. For instance, accelerating and braking quickly and driving at high speeds cause the gasoline engine to have to work more, which means lower miles per gallon and more fill ups. Driving at lower speeds, generally 35mph and lower, along with slower acceleration and braking mean that the vehicle will run off the electric battery as much as possible. The two engines work together recycling energy for the electric battery when the gasoline engine is running. An example of this is slowly coming to a stop—the battery recharges from the energy created from the gasoline engine as you stop. is are cool because they use the battery recharges when you’re braking utilizing braking energy. Recycling energy is what we need right now. But only recycling won’t be enough to cut the mustard going forward.

The future is coming! Purely electric powered cars (no SUVs yet) are out there right now and have been available for the last couple of years. There are also cars like the Chevy Volt which feature a mostly electric motor with a very small gasoline engine for backup just in case. Currently, purely electric-powered cars, like the Nissan Leaf, are on the market but are expensive for the size of the car and how far it can go before needing to be recharged. But as the technology gets better, the price will drop and the performance will improve, and the carbon footprint left behind will get smaller.

Hopefully, 15 years from now, there will be less hybrids and more cars like the Leaf and Volt on the road, making a carbon footprint that looks like just your big toe touched the sand. And I’d like to see gasoline-powered vehicles in museums and maybe one or two at a local antique car show—and that’s about it!

Much like how a hybrid engine works, I’m going to take two things and combine them: yoga practice and my husband’s 2012 Toyota Prius C. I’m going to teach you how yoga can be incorporated it into your driving. My theory is a calmer, balanced driver makes the best driver. And the best driver creates an awesome driving experience.

You don’t need to have a hybrid vehicle to follow along with me, although I wish you had one. Heck, I wish I had one and didn’t need to borrow my husband’s.

Welcome to Project Prius C—Yogic Driving. The future is coming!

Namaste!

Sara and her husband Pete’s Prius C (as pictured below—the husband and the car)

20140327-214352.jpg

Namaste–A Beautiful Greeting

Namaste is a greeting used in yoga.

“Namas” means “bow” in Sanskrit. “Te” means “to you” in Sanskrit.

Namaste means “I bow to you”. Other ways to say it are “I greet you” or “I welcome you” or “I honor you”.

With that, I hope you have a wonderful Wednesday!

Namaste,

Sara

How to Make Rejuvelac, Part 4: Drink Up!

Welcome back!

This is our last step! Here’s what you’ll need:

  • An empty glass jar (or jars) for storage of approximately six cups of rejuvelac—the typical amount yielded for me from one cup of soaked, sprouted and fermented rye berries. Any glass jars that were used to store pickles, olives or spaghetti sauce can be re-purposed as storage containers for your rejuvelac (just make sure you get rid of the old odors and tastes first).
  • A small funnel (optional, but highly recommend)
  • Six more cups of water if you want to make another batch (optional).

The rejuvelac will look like this after 48 hours of fermenting.

20140322-204715.jpg

It should look cloudy with a pale yellow color (similar to freshly squeezed lemonade). Remember in Part 3 when I told you not to shake the jar? You’re still not going to shake the jar! But you will need to pick the jar up and tip it to the side to decant the rejuvelac. As you move the jar you will see small bubbles running from the bottom to the top of the jar. The fermentation process creates carbonation. Another byproduct of fermenting is the foam floating at the top of the jar. Neither the bubbles nor the foam will hurt you.

20140322-204732.jpg

Now tip the half-gallon jar with the rejuvelac to transfer the rejuvelac to the storage jar. You do not want the rye berries in your drink and keeping the cheesecloth secured to the jar ensures the rejuvelac will separate from the rye berries. Placing a small funnel at the neck of your storage jar makes the transfer process from berry jar to storage jar a lot less messy.

Here’s the finished product—two 1&frac; pint jars of rejuvelac, giving me a total of six cups!

20140322-204749.jpg

I highly recommend putting the rejuvelac into the fridge for an hour or so to get cold before drinking. I like it best cold!

Now what to do with the sad-looking rye berry jar??

20140322-204807.jpg

Great news—you can use it for two more days to make more and more rejuvelac! Refill the jar with six or more cups of water and let it ferment again over night and then decant it after 24 hours. I usually do three total decantings—one from the 48 hour fermentation and two more from two 24 hour fermentations.

I’’ve read that if you have leftover rejuvelac that you don’t want you can use it to water your plants with!

As for the rye berries I have a special story for that:

I have a freezer bag filled with old berries I’ve used for rejuvelac. On April 18, 2014 when Pete and I go down to Indiana University in Bloomington, Indiana to celebrate our second wedding anniversary, we are going to take the leftover berries with us and use them to feed the fat squirrels on campus! So you can either throw away your leftover berries or you can feed them to small critters in your local park, but take the berries away from your house to give to animals. If you feed the critters at your house you will have repeat, nuisance visitors. Nobody likes a pest!

When Pete and I go to Bloomington, we always stop at Oliver Winery! When we visited Oliver Winery in 2012 we acquired a free wine tote bag with six storage slots for carrying six bottles of wine. You know what else the wine tote is great for? Taking your glass jars of rejuvelac with you when you’re on the go.

20140322-204822.jpg

Peace,
Sara

The Ballroom “Look”

I saw this video posted by a friend on Facebook this afternoon. I wanted to share both the video and my thoughts on the interview with you.

Toni Redpath, the woman interviewed in the video below, is a professional ballroom dance competitor and a ballroom dance competition judge. I’ve seen her perform at competitions in the past and her movement on the dance floor is both beautiful and breath-taking. Toni’s statements on how she judges female dancers at competitions based on their “look” instead of just their ability is a common calamity at any ballroom dance competition.

The interview starts off on a positive note. Toni explains what she’s looking for when she judges the Bronze, Silver and Gold syllabus levels. Toni also describes what she looks for when she judges the Open category, the most advanced level where you can link together syllabus steps of your choice in addition to making up your own choreography.

About 2/3rds of the way through the interview Toni reveals that she judges female dancers on their ballroom “look” rather than their dance ability. Toni clearly states that “the girl who has the better look” gets a better score when she’s judging two women with nearly the same ability.

Watch the interview below, and you’ll see what I mean.

Is presence or a “look” important? Yes. I agree with Toni that the appearance of the dancer is important because costumes, makeup and a clean hairstyle should compliment your dancing. Competitions and performances are special days to celebrate the hard work you’ve done. Celebration of hard work at ballroom dance competition is usually expressed by dressing up in a fancy costume, putting on makeup, getting your nails done and donning some sparkly accessories. Your costuming should accent your dancing. Your costuming should not be the only thing the judge notices.

To achieve the “look” that Toni refers to at a ballroom dance competition, you will need a spray tan to turn your skin orange (note–not brown) so you can be seen under the bright lights, fake finger nails, false eyelashes, heavy eye makeup up to your eyebrows and a clean hairstyle in which your hair needs to be either very long or very short and your hair color needs to be dyed either a very, dark brown or a blinding, platinum blonde. Your weight is also considered a definite factor in your “look”. I’ve had coaches in the past look at me during a coaching session and comment that losing 5 to 10 pounds would go a long way to helping my “look” on the dance floor. Comments about my weigt always crushed me. When I danced I wasn’t ever obese. I was healthy and strong but never skinny enough to meet my coaches’ expectations.

Additional requirements to achieve the “look” include the purchase of one or two dresses—either a ball gown and/or a Latin gown, depending on which style(s) of ballroom dance you’re competing in. These dresses are not cheap. If you buy a decent dress you can expect to pay upwards of $2,000.00 for a used dress or approximately $4,000.00 for a new dress. If owning a dress that will go out of style within 2 years requiring you to purchase another dress so you can keep improving your “look” is not the route you want to take, you also have the option of renting a dress for a minimum of $250.00 for one competition weekend. Either direction you choose, owning and constantly replacing your gown(s) or renting a new gown(s) each weekend you that you compete can add up fast. Tack on accessories like earrings, necklaces, rings, bracelets and/or gloves, and you can expect to pay $300.00-$500.00 for that alone. Suddenly your “look” has become an expensive investment. And remember—none of your investment has gone towards your dance coaching to help improve your ability.

Think of any other sport—triathlons, marathons, 5Ks, football, basketball, baseball etc. None of these sports place any emphasis on how you “look” when you perform. Your score is determined by you and/or your team’s ability to perform well. Yes, you spend money on uniforms and gear. Sometimes the more money you spend on gear can greatly benefit your ability. However, the way you “look” isn’t a determinant in these sports to be winner. In these sports, ability always outshines the “look” when you’re when you’re fighting to win.

If you struggle with similar concerns regarding your “look” at a ballroom dance competition, my recommendation is be true to yourself, proud of the hard work you’ve done and dance the best you can. If you feel that you’re clean and professional appearance on the dance floor isn’t winning you any medals, then keep on dancing harder. Don’t go out and purchase another costume. Costumes shouldn’t be judged. Your overall ability is what should shine through to the judges.

Peace,
Sara

MODEL NEEDED

This Friday afternoon, as I sat in my hot, stuffy office cubicle, I yearned for a bit of joy. So, I logged into Facebook to live vicariously through my friends’ status updates for a few moments. As I started to peruse the news feed, I came across this post from my friend, Tim Fealy:

NEEDED.. 1 or 2 attractive friends (man or woman but size small or medium) to model a “boot camp” shirt by the military tank this afternoon. Msg me if you are able to. Shirts provided. And I can pay you with a shirt. Thank you.

First, I thought to myself, “You can do this”. Then I wondered if Tim would be willing to trade the free t-shirt for a service donation to my marathon charity (Opportunity Enterprises—OE for short) instead. (FYI, a service donation is an exchange of one person’s time for another person’s donation to a charity.)

I messaged this to Tim: “I can help. I get out of work at 5pm. I work right at the intersection of Taft and Route 30 so I’m close by.”

Tim messaged me back with instructions on where the set for the photo shoot was. I was excited! A model? Me? Who knew?

I reviewed my self-doubts noticing one particular doubt I’ve always struggled with—my non-model body. Let’s face it—being 5 feet tall with an athletic, curvy build isn’t what usually graces the front page of magazines. Instead of having a sinewy Kate Moss-like body, I am built more like Olympic gold medalist, Shawn Johnson. I convinced myself that being built like an athlete wasn’t necessarily a bad thing at all for modeling at a fitness-related photo shoot. I was going to be photographed for a race called Beast Boot Camp 5K. Perhaps I could model fitness. Perhaps my strength would come across in the photos.

When I showed up on set, I found a tiny Sara looking up at this giant military war tank:

tankpicture

Photo taken by http://posttrib.suntimes.com/photos/galleries/index.html?story=8977789

By the way, funny tidbit, those Christmas lights are still on that pine tree to the left of the tank. You can see them clearly in the daylight!

Once I put on the Beast Boot Camp 5K t-shirt, I got it in my head that I should climb on top of the tank. Despite my flip-flops not making the climb an easy accomplishment, with a helpful hand from Tim I managed to monkey-climb my way up to the first level of the the tank and eventually climbed to the second, upper part of the tank. Once on top of the tank I found I had to relax and breathe to calm my initial fear of heights. After a few breaths I was able to weave my way around the tank to pose for photos like a spider on a web. Once Tim started taking pictures I found I’d left my fear of heights in the lost-and-not-wanted-anymore bin, at least for now. I felt so free on top of that army tank modeling a camouflage Beast Boot Camp 5K t-shirt.

I took an assisted lift from Tim to get down from my jungle gym in the clouds that I’d found. I posed for a few pictures on the ground next to the tank and then—the photo shoot was over…

So now what?

Tea with the photographer is what! In exchange for helping out my friend Tim I received the offer of tea and conversation with a friend at Sip Coffee House in Crown Point, Indiana.

I never got to ask Tim about a service donation to my marathon charity. I also hadn’t seen—and still haven’t seen—the photos that he took of me atop of and next to the tank. We sat in comfy chairs at Sip, had tea and a hot cocoa and chatted. Tim gave me some much appreciated advice about my blog—to write more frequently.

I’m so glad I answered Tim’s Facebook ad. I got to be a model and a friend tonight by taking a leap of faith and answering an ad I found on Facebook for a MODEL NEEDED.

Peace,
Sara

How To Make Rejuvelac, Part 3: Fermenting

Happy St. Patrick’s Day!

This morning I woke up to find that my rye berries had sprouted. Yay! What a great day to ferment something in honor of green beer!

Here’s what the sprouted berries look like. You should see tiny, thin tails protruding from the bottoms of the berries.

20140317-214630.jpg

The last step before we start to ferment is adding 6 – 7 cups of water (tap, purified, etc.) to the jar. Leave the cheesecloth attached, make sure the jar is upright and set the jar with the sprouted berries in a dark, warm space for 48 hours. Do not shake the jar. The berries need to be immobile for the fermenting process to start.

20140317-213312.jpg

I will be back in 48 hours to show you how to bottle and store your fermented beverage (FYI, this contains zero alcohol). In the meantime, simply walk (or run, or bike) away!

20140317-213347.jpg

Happy St. Patrick’s Day!

Peace,
Sara

How to Make Rejuvelac, Part 2: Waiting

Welcome back!

At this point, your sprouts should have been soaking for 8 – 12 hours.

Now, take your Mason Ball jar to the sink and pour all of the water out. The seeds will stay in the jar because the cheesecloth we securely attached to the jar in Part 1 acts as a strainer, letting the water flow out of the jar but trapping the seeds inside.

20140316-202952.jpg

Next, turn your jar upside down so the rye berries fall down towards the cheesecloth and the bottom of the jar is sticking up in the air. Place the jar with a slight tilt into either a dish drainer or a large bowl making sure to create a space so the berries can breathe. Allow the jar to rest this way for 8 – 12 hours so the water drains out and the berries start to dry.

20140316-203011.jpg

20140316-203023.jpg

In my experience, I need to rinse and dry the berries a second time before they start to sprout. Re-rinse the berries and place the jar so the berries can dry out again, then simply walk (or run) away for 8 – 12 hours.

20140316-203122.jpg

When you come back you will start to see small sprout tails growing from the end of the rye berries.

Peace,
Sara

How To Make Rejuvelac, Part 1: Soaking

Rejuvelac is a fermented beverage that is made from a sprouted grain such as rye, soft white wheat berries or quinoa (the list goes on).

I’m going to show you how to make rejuvelac at home. This will be a multi-day process with minimal work and lots of results.

Here’s what you will need for Part 1:

  • 1 cup of grain. I will be using rye berries on this post. I recommend non-gmo, organic berries if possible. I get mine at a store that sells them in bulk. For me, the cost per cup is $0.75.
  • A 1/2 gallon glass jar with a wide mouth, like a Mason Ball canning jar. Michael’s, a craft store, sells them in different sizes.
  • 1 square of cheesecloth, which you can purchase at the grocery store.
  • Water. Purified or tap is fine.
  • A rubber band or Mason jar lid, used to secure the cheesecloth.
  • A wooden spoon.

Here are step-by-step instructions (with pictures included) on soaking grains for making rejuvelac.

  1. Take 1 cup of rye berries and put them in a 1/2 gallon sized Mason jar.

    20140315-212837.jpg
    20140315-212857.jpg

  2. Put three or more cups of water into the jar to cover the berries.

    20140315-212920.jpg

  3. Take a wooden spoon with a long handle, put the handle into the water and stir briskly. By doing this we are making sure that all of the berries are completely immersed in the water.

    20140315-235924.jpg

  4. Remove the spoon. Using scissors cut a small square or rectangle of cheesecloth to cover the mouth of the jar. Secure the cheesecloth with either a rubber band or the lid of the Mason jar.

    20140315-212942.jpg
    20140315-212958.jpg

  5. Walk (or run) away and let the berries soak overnight (or about 8 – 12 hours).

    20140315-213104.jpg

I usually start soaking them in the morning before work so when I get home they’re ready for the next part—sprouting!

Peace,
Sara

My Review of Wine & Canvas South Bend

I have taken four painting classes with Wine & Canvas South Bend. Do not let their company name fool you. Even though they are called Wine & Canvas South Bend, they travel to Northwest Indiana locations including the Radisson Hotel in Merrillville, Indiana and Blue Chip Casino in Michigan City, Indiana. Wine & Canvas South Bend also offers classes at their studios located in Elkhart and Granger, Indiana.

I found out about Wine & Canvas, for short, through a Facebook friend, Robin. She was sharing a Wine & Canvas event link on her Facebook page. When I went to the Wine & Canvas website and checked out their calendar, I was hooked. I loved the variety of paintings that were offered. I located to my purse, fished out my debit card and signed up for four painting classes on Thursday nights at the Radisson Hotel. I was ready to paint!

The price is $35 per class which includes art supplies such as an apron, gallery-wrapped canvas, paint, brushes, easels and an artist to guide you through the class. Classes are approximately 3 hours long. Alcoholic beverages, soft drinks and food are not included in the price but are available to order for an additional cost. At the Radisson, the food and drinks come directly from the hotel’s restaurant, T.J. Maloney’s. By not including food and drinks in their price, Wine & Canvas is able to keep their prices low.

Here are the four paintings I’ve completed:

My first painting was called Paradise Moon:

20140314-180432.jpg

This painting is called Vintage Romance:

20140314-180557.jpg

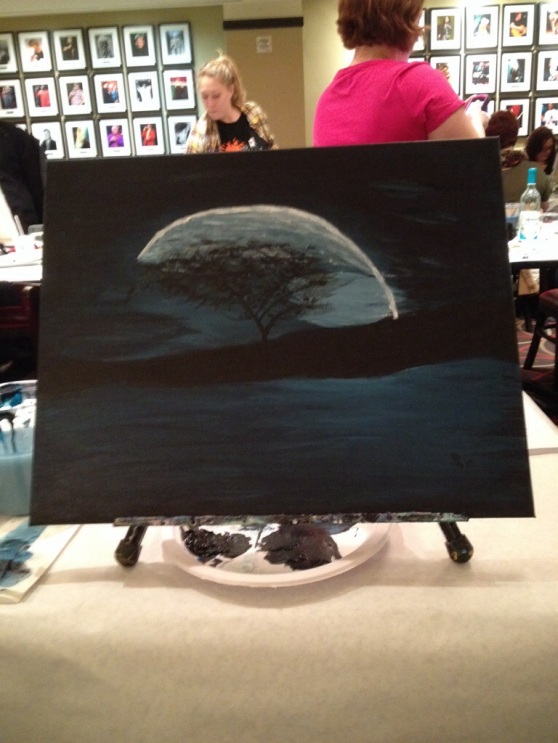
This painting is called Quiet Moon:

20140314-180630.jpg

This painting is called Moonlight Flight:

20140314-180655.jpg

The painting classes are a fun, indoor activity which gave me a chance to dip into my artsy side. I did my paintings during February and early March, which made the rest of the winter fly by because every week I had a new painting to look forward to.

Here are two other things I discovered along my the way after attending the four classes:

1. Get there before 5:30pm to reserve yourself or your party a seat in the front. Wine & Canvas pre-seats larger parties of 6- – 7 people so all of the group members are able to sit together. Canvases are used to reserve spots. If you get there early and no one from a pre-seated large party is there yet you can ask one of the assistants to move the parties’ canvases down a few spots so you can sit in the front row. There’s no reason you have to sit in the back when you arrive that early. Wine & Canvas rewards people who arrive early.

Shown below are the canvases reserving spots for a 7 member party:

20140314-180723.jpg

Shown here is the rest of the empty room.

20140314-180747.jpg

If you want to sit front and center, just ask!

2. The start time is advertised as 6:00pm, but the actual start time is 6:15pm. I verified the start time with Torie Jaques, an employee at Wine & Canvas South Bend, over the phone. I asked Torie why Wine & Canvas doesn’t show their actual start time on the calendar. Her response was, “If we adjust the time on the calendar to 6:15pm or 6:30pm, then we would have to wait for late comers to arrive and not start the class until 7:00pm”.

Here’s what I do to pass the time because I arrive very early:

Upon arrival after work at 5:10pm, I check in and reserve my spot right up front. I leave the painting room and come back at 6:15pm. Meanwhile, I find a spot inside the Radisson to relax, either at Starbucks or one of the many tables set up around the hotel, and pass the time with a quiet activity such as listening to music, reading a book or writing in my journal.

I hope you try out a class. I hope you enjoy yourself and the beautiful painting that you will produce!

Peace,
Sara